How to Make Mushroom Grain Spawn
Click here to see the video tutorial.
Grain Spawn Basics
High quality mushroom grain spawn is fundamental to any mushroom growing project. Grain spawn is simply mushroom mycelium grown on grain (rice, wheat, millet, etc.). The purpose of grain spawn is to give the mycelium a nutritional reservoir that allows it to thrive when expanded into a new substrate like sawdust or straw. In addition to acting as nutritional supplement, grain is a great inoculum because each colonized kernel acts as an inoculation point that helps to evenly distribute the mycelium. Healthy and robust grain spawn is one of the most important factors in mushroom cultivation. If you start a cultivation endeavor with grain spawn of poor quality, you’re more likely to encounter contamination, slow growth, or other failures. Whether you plan to grow at home or on a commercial scale, making grain spawn properly is imperative.
Sourcing Grains
A variety of grains can be used to make good grain spawn. Most commonly used are rye, millet, brown rice, corn, and more. When choosing which grain to use its important to keep various factors in mind. Grain size, price, and quality are the most important factors to consider. At Mother Mycelium we use millet and rye to make mushroom grain spawn. These are both economical options that are readily available in our area. It’s always a good idea to use locally grown grain if you can. This will help cut on cost and support local farms. Millet is a great option because it has a very small grain size which will result in more inoculation points when your grain spawn is inoculated into other substrates.
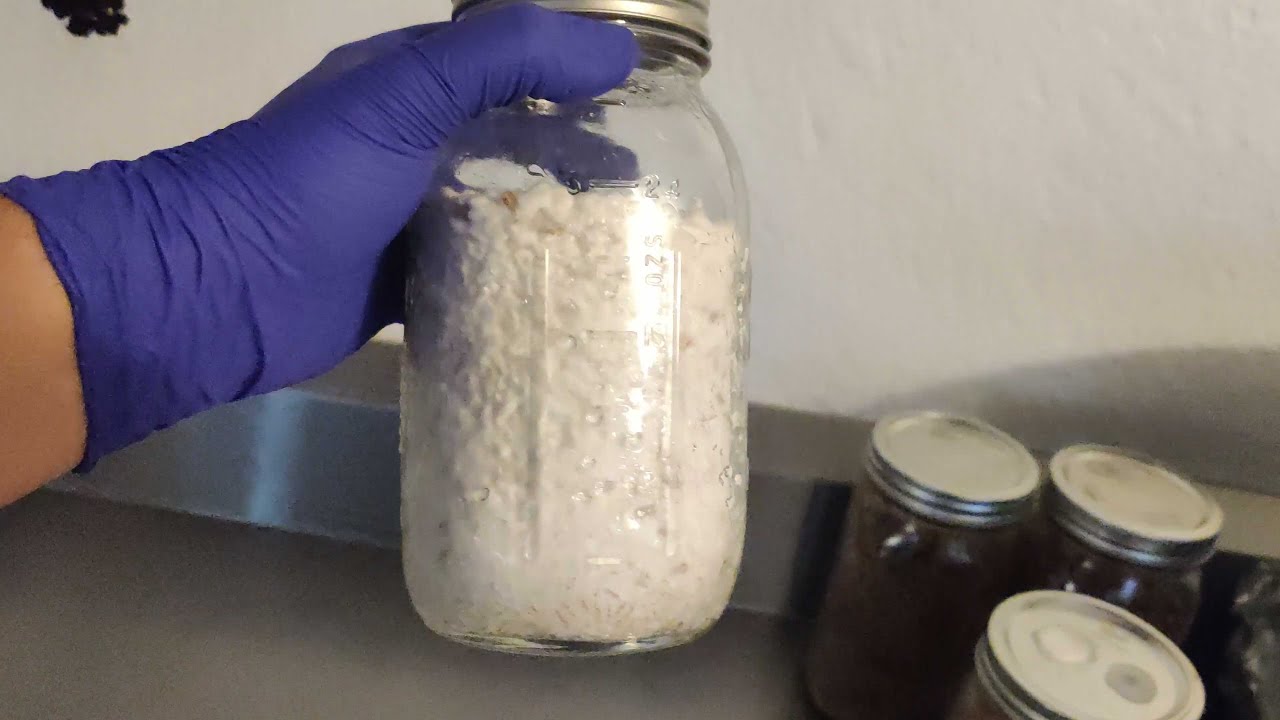
Choosing the Right Container
Now that you’ve sourced locally grown, quality grains it’s time to choose your grain spawn container. Glass jars are a great option for small-scale growing projects. Jars are reusable, autoclavable and readily available. Jars can also be used on a larger-scale, but there will be more upkeep involved with cleaning the jars and ensuring they don’t fracture and break overtime. Jars will also need to be outfitted with specialized mycology lids that have a filter patch to allow for contaminant free air exchange. Specialized polypropylene bags that are outfitted with a filter patch can also be used for grain spawn. These are great for large-scale operations because they are autoclavable, cheap, and there is no extra labor involved with cleaning to reuse them. The major drawback is the extra plastic waste they create when you’re done using them.
Hydrating the Grain
Proper grain hydration is one of the most important factors to focus on when making grain spawn. There are many techniques to achieve proper hydration, the most common are “pre-cooking” and “dry mixing”. Cooking the grains in boiling water prior to sterilization ensures all the grains are evenly hydrated to the proper level. Pre-cooking can also keep the grains from clumping after sterilization. The “dry mixing” method is more efficient and very easy, but the grains will not be as evenly hydrated, and the grains can form problematic clumps after sterilization.
Precooked Grain Protocol
- Add the desired amount of grain to boiling water (The grain will expand by 2-3x its original volume)
- Boil the grain for 15-30 minutes (the actual time depends on your specific grain and its starting hydration)
- Strain the cooked grain and let excess water steam off for 20-30 minutes. Note: it is important to thoroughly strain the grain to avoid excess water.
- Add the pre-cooked grain to your jars or bags and sterilize at 15 psi for 2.5 hours
Dry Mixing Protocol
- Add the desired amount of grain to your jar or bag. A good baseline for hydration is to use 33% grain and 67% water. (Formula and examples below)
- Add the correct amount of water
- Sterilize at 15 psi for 2.5 hours
- When the jars or bags have cooled enough to handle, shake them in sterile conditions to distribute the moisture evenly.
| Grain Hydration Formulas | Example |
| Target weight (g) * 0.33 = dry grain weight (g) | 450g total weight * 0.33 = 150g dry grain |
| Target weight (g) * 0.67 = water weight (g or ml) | 450g total weight * 0.67 = 300g water |
The formula given above is a general baseline to get you started, tweak it to your specific needs as you become more experienced. You’ll know the hydration is proper when most of the water is locked within the grains and there is not excess water pooling in your bags or jars. Popped and/or clumpy grains can also be a sign of excess water. Too much water will hurt the grow of your mycelium and encourage the growth of anaerobic bacteria. If the grain is too dry, the mycelium will grow slowly and likely stall over time.
Additives (gypsum, coffee, etc.)
You can add a variety of supplements to your grain spawn to promote rapid and robust mycelial growth. Common additives are gypsum and coffee. Gypsum (calcium sulfate dihydrate) adds basic minerals to promote the mycelial metabolism. Coffee grounds or coffee will add extra nitrogen and give your mycelium extra nutrients for rapid growth.
Sterilization
Sterilization is a fundamental part of making grain spawn. There are spores and endospores of thousands of yeasts, molds, and bacteria that would love to consume your perfectly hydrated grain. To ensure you grow the type of fungus you intend to, and only that type, you must sterilize the grain prior to inoculation. This will ensure that you’re starting with a clean slate so that your mushroom mycelium can thrive without competition. Sterilize your grain for at least 2.5 hours at 15 psi. If your autoclave or pressure cooker is packed tightly, increase the sterilization time to ensure high enough temperatures are reached during the process. Presto pressure cookers are reliable and readily available. The induction version paired with an induction plate allows you to sterilize anywhere you have access to a power outlet. If you’re wanting to start making your own grain spawn, a pressure cooker is a worthwhile investment.
Inoculation
Sterile inoculation is more important than all the previous steps. You can succeed at all the previous steps, but if your inoculation is not sterile, your grain spawn will inevitably fail. Please see our full breakdown on aseptic (sterile) technique. It may seem intimidating at first, but sterile inoculation can be done with no prior-experience and no special equipment. If you have a liquid culture syringe and a self-healing injection port on your grain jar or bag, you can successfully inoculate grain. Simply wipe your injection port with isopropyl alcohol or an alcohol wipe, then flame sterilize the liquid culture needle and inject straight into the injection port. This is a fast and reliable method for inoculating grain without a flow hood or other special equipment. Click here to see the video tutorial.
Incubation
Once you have inoculated your grain, place it where it will receive no light or indirect sunlight. Keep it at a temperature between 68-75 degrees Fahrenheit (20-24 C). Leave the grain spawn undisturbed for 5-10 days. After 5-10 days, check the spawn for healthy growth and to confirm no contamination is present. Leave the grain undisturbed for another few days until the mycelium has a good hold on the grain. When the mycelium is established, break it up and distribute the colonized grains with the uncolonized grains. This will help distribute the mycelium and ensure even and rapid colonization. Keep the grain spawn at the previously mentioned environmental conditions until it is fully colonized and white with mycelium.
Using colonized grain
Colonized grain can be used to inoculate a variety of substrates. Mostly commonly used are sawdust, straw, coco coir, and other agricultural biproducts. You’ll want to make sure you pick an appropriate substrate for the species of mushroom you are growing, but that’s a topic for another post. Healthy grain can be used to inoculate sterilized, pasteurized, or non-sterile/natural substrates depending on the application. If you are inoculating pasteurized or non-sterile substrate, special equipment and aseptic technique are not required. When inoculating sterile substrate, a good baseline is a spawn rate of 5-10% (or lower). For example, if you are inoculating 10lbs of sterile substrate, you will use 1lb of colonized grain spawn. If inoculating pasteurized or non-sterile substrate, it is a good idea to use a higher spawn rate (20-35%). A higher spawn rate will ensure rapid colonization and will help to avoid excess contamination on non-sterile or pasteurized substrates.
Questions? Comments? Click here to join our Discord sever to get answers and advice from the pros!
Latest Articles
Latest Articles
Mycology Glossary: Unlocking the Language of Fungi
Fungi are fascinating organisms, but the world of mycology (the...

Introduction to Mushroom Foraging in the Rockies
Mushroom foraging is a unique adventure that combines hiking, nature...

DIY Mushroom Grow Bags
Intro Growing mushrooms at home doesn’t have to be complicated...

Colorado Mushroom Hunting Resources
Whether you’re just starting your journey into mushroom foraging or...